Dependency Injection in ASP.NET MVC 3 using Ninject
Since the release of ASP.NET MVC 2, I am learning Dependency Injection in ASP.NET MVC. I used Microsoft Unity and realized the need for it to simplify ways to handle the dependencies between objects.
I have seen a lot of open source developers using Ninject as a dependency injector and I think I’ll give it a try. In Rob Conery’s MVCStarter, I have seen good implementation of IoC setup using Ninject 2.0 it was good but I have too many works done in MVC application’s Global.asax.cs file. I didn’t like that configuration but I’ve no choice.
With the release of ASP.NET MVC 3 BETA [currently in RC 2] they have made significant changes to the IoC support, please look at Brad Wilson's post, for service location/dependency resolution with MVC, they introduced new interface: System.Web.Mvc.IDependencyResolver. You have to implement this interface within your application and register it with System.Web.Mvc.DependencyResolver’s static method SetResolver(IDependencyResolver resolver).
In Scott Guthrie's post, I have downloaded and study the Ninject implementation of dependency injection and happy with the neat code he wrote. no use of Ninject MVC extension: Ninject.Web.MVC, it is due to the new IoC support in ASP.NET MVC 3.
There are some questions asked regarding it on stackoverflow, So I decided to write a brief post on how to use Ninject 2 in ASP.NET MVC 3.
Prerequisites
you will need to download the latest build of Ninject from here. I download this Ninject-2.1.0.91-RC2-release-net-4.0.zip. You also need the latest release of ASP.NET MVC 3 [RC 2]. If you download the project at the end of this post then you don’t need to download Ninject binaries it’s been provided in the project itself.
Let’s start
Create new project: File –> New –> Project
You can download the ready to run project at the end of this post.
Select ASP.NET MVC 3 Web Application as shown below:

After clicking OK you would see new ASP.NET MVC 3 Project dialog asking you to select Template, View Engine and you want Unit Test project or not.

Now you have your new ASP.NET MVC 3 Web Application project ready.
For demonstrating dependency injection we need some sort of interfaces and their concrete implementations, so in that regard I will add a new interface named IMessageService and it’s implementation MessageService in the new Services folder to the project root.
Here is the interface IMessageService:

and MessageService:

Now setting up project to introduce dependency injection, this is the time to add a reference to Ninject.dll that you have downloaded as described earlier, if you are lazy like mine then download the project linked at the end of this post.
Now open up Global.asax.cs and add the using Ninject; statement to add a Ninject reference, from ASP.NET MVC 3 Beta and above we have to implement IDependencyResolver for DI work, so It can be implement like this:

Now in the Application_Start(), we want to hook our DI related stuff. for simplicity, like Scott Guthrie did, I’ll add a method which do it all like that:

ok, in the method above I created a standard kernel which is implemented in the Ninject.dll and bind our service to it’s concrete implementation, say whenever the application encounters the IMessageService then it will automatically creates a new instance of MessageService damn simple isn’t it, don’t forget to call above method in Application_Start().
To test it, open up HomeController and change it like that:

First, I add a private readonly field _messageService that holds our service instance on the fly. I also add a class constructor which takes single parameter of type IMessageService and then set it to our private field.
In Index() ActionResult method I called the GetMessage() and we are done, look I didn’t create a new instance of MessageService class anywhere it will automatically created by our DI container.
Now run your application by pressing F5 or Ctrl+F5 you will see:

you see the message above it comes from our MessageService class’s GetMessage() method which I called in HomeController.
Hope you understand how DI works in ASP.NET MVC 3 with Ninject without the need of Ninject.Web.Mvc extension, thanks to the Phil Haack and team.
Now for your comfort, download the ready to run project right now.
Note: I have been learning coding best practices since my early development years, so if you found that I made a mistake here and there then please express it in comments below, I appreciate that and will learn from you.
Enjoy!
jQuery UI AutoComplete Widget with ASP.NET MVC
In this post I am showing you how to use jQuery UI Autocomplete widget with ASP.NET MVC. The Autocomplete widget provides suggestions when you type some text into the text field. This is very useful when you provide search box to find data, so lets start using it in Fresh ASP.NET MVC website.
Overview
From the jQuery UI website, Autocomplete, when added to an input field, enables users to quickly find and select from a pre-populated list of values as they type, leveraging searching and filtering.
By giving an Autocomplete field focus or entering something into it, the plugin starts searching for entries that match and displays a list of values to choose from. By entering more characters, the user can filter down the list to better matches.
Autocomplete can be customized to work with various data sources, by just specifying the source option. A data source can be:
- an Array with local data
- a String, specifying a URL which returns Json formatted data
- a Callback
What you will need?
To use jQuery UI widgets you will need jQuery UI library, you can download the latest version from here. Please make sure that you select the Autocomplete checkbox in the widgets section while downloading.
After unzip, the library folder structure looks something like this:
From here we are interested in CSS and JS Folder. CSS folder contains the theme files [images and stylesheet] which you selected while downloading, in JS folder you will find JavaScript files which are required to work with jQuery UI.

Setting up project
I am assuming that you have Visual Studio 2010 Express or higher installed along with SQL Server 2008 Express or higher. I am using Visual Web Developer 2010 Express and SQL Server 2008 R2 Express on my machine both are freely available from Microsoft. I like Microsoft products very much.
Open Visual Web Developer 2010 Express from start menu and create new ASP.NET MVC 2 Empty Web Application project from the installed templates, you now have a working project.
Now add jQuery UI library to the newly created project.
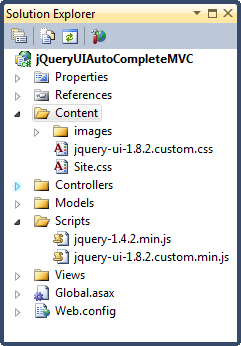
Add images folder and jquery-ui-1.8.2.custom.css file from the CSS folder to the Content folder in the project then add both JavaScript files from JS folder to the Scripts folder.
Your solution explorer window may look like this:
In this MVC application I’ll use AdventureWorks LT 2008 R2 database to show data in jQuery UI Autocomplete widget. To work with the database I’m also adding ADO.NET Entity Data Model [edmx] file in the Models folder, I am adding only Customer table from the AdventureWorks LT 2008 R2 database.
Lets add our Data Model in the project, right click on the Models folder and select add new item, select ADO.NET Entity Data Model from the list of items in the Add New Item dialog and name it AdventureWorksDB.edmx. Follow the wizard and add connection to the AdventureWorks LT 2008 R2 Database or any other database that you have on your machine and add table that you want to work with, but you have to change some code according what you have selected.
If you done exactly as described then we have our Data Model ready to work in the Models folder.
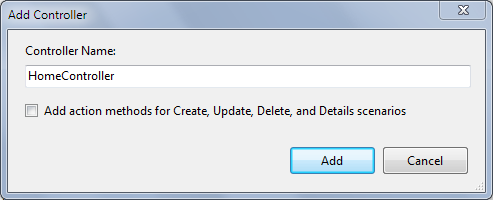
Now add Controller in the project, just right click on the Controller folder and click Add Controller, name the controller as you want I name it HomeController:
Now we have to add HomeController’s Action method which returns Json formatted data of Customers Object from the AdventureWorks database.
Here is the Action Method which is called by the Autocomplete widget and returns Json formatted data.
public class HomeController : Controller
{
    //
    // GET: /Home/
    public ActionResult Index()
    {
        return View();
    }

    public JsonResult GetCustomers(string term)
    {
        AdventureWorksEntities db = new AdventureWorksEntities();
        var customers = from cust in db.Customers.Where(c => c.LastName.StartsWith(term))
                        select cust.LastName;
        customers = customers.Distinct();
        return Json(customers, JsonRequestBehavior.AllowGet);
    }
}
In the above code for the HomeController there are two Action methods, Index() which is created by default and GetCustomers(string term) which is used to get Json formatted data. In the GetCustomers(string term) you see we passed parameter “term” of string type, which is passed as a Request variable from the Autocomplete widget and is used to get data based on it.
Before working with the Entity Data Model we first need to add a using C# statement in the HomeController to get reference to the Models just like that:
using YOURPROJECTNAME.Models;
Move to the GetCustomers(string term) Action method, I declared a variable db of type AdventureWorksEntities which have all our Data Objects programmed in it by the Entity Framework, I then defined a variable customers and shape the required data by using LINQ to Entities, remove duplicate entries by calling Distinct() Extension method and finally return customers as a Json.
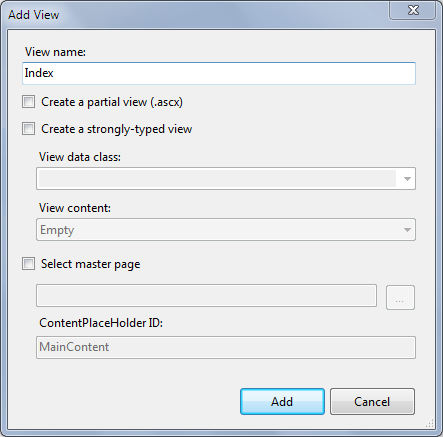
Ok, we now have our Controller ready for the Autocomplete widget, finally we have to add a View for the Index() Action method, to add a view simply right click anywhere in the HomeController’s Index() Action method and click Add View context menu item this is the easiest way to add View. Follow the options as shown in the image below for Add View.
I didn’t add any Master View page to the project yet that’s why I didn’t checked Select master page checkbox, if you have one added already then you can check it.
Visual Web Developer adds Index View as Index.aspx in the Views/Home folder and opened it for editing. In the Index.aspx view page add the following code in the head section which are required to add Autocomplete suggestion feature to the text fields.
<link href="../../Content/jquery-ui-1.8.2.custom.css" rel="stylesheet" type="text/css" />After adding above references add the following HTML code in the body section which adds a label and text input control which acts as a Autocomplete widget.
<script src="../../Scripts/jquery-1.4.2.min.js" type="text/javascript"></script>
<script src="../../Scripts/jquery-ui-1.8.2.custom.min.js" type="text/javascript"></script>
<label for="customers">Find:</label>Finally add the following javascript code in the head section to bind the Autocomplete widget to the text input field.
<input type="text" id="customers" />
<script type="text/javascript">
    $(function () {
        $('#customers').autocomplete({
            source: '<%= Url.Action("GetCustomers") %>',
            minLength: 2
        });
    });
</script>
We are done here with Autocomplete widget, now build and run the application by pressing F5. If all goes well then you are presented with application running in the default internet browser, to test Autocomplete widget just type two or more letters in the input field and the results will show instantly. see the screenshot below:
I hope you have successfully implement Autocomplete widget as described above. jQuery UI Autocomplete widget has a few options to set as desired, you can have a look on it by going here.
Hope this works!


